This part of the journey marks over two months of reading my previously linked book, and learning how to setup my own cluster and storage/network components. While I wanted to continue on adding applications I use, like Pihole, Uptime Kuma, and Nextcloud, I thought a first “easy” deployment would be with Librespeed. While I could have run this all in one container, I wanted to explore the micro-service architecture idea and have multiple pods running. Seeing this all finally work was super rewarding!!
Kubernetes concepts covered
While I know I haven’t fully scratched the surface with all the possible Kubernetes components, I tried to take the main concepts that I learned and used them here. I will go over the few that I needed to use. The full Kubernetes MySQL database manifest is posted here, which I reference in sections below.
Services
Remember that container IPs and even containers themselves are stateless. Containers could spin up on one host and get one IP, but it may crash and is recreated on another with a different pod IP space. So, I asked myself, how would my web app have a consistent backend database to send to?
This is where services come into play that will give a consistent IP and DNS name to which other pods can communicate. In my head at least, this operates similar to a load balancer with a front end IP (that stays the same for the duration of the deployment) and a back end which will map to different backend containers. Below is part of the full manifest which I worked through, linked here.
apiVersion: v1
kind: Service
metadata:
  name: mysql
spec:
  ports:
  - port: 3306
  selector:
    app: speedtest-db
This simply tells Kubernetes to create a service named “MySQL” on port 3306, and to choose back ends which have a label of app: speedtest-db. This will make more sense in the Container Definition section.
Config Map
Config maps have many useful instances. They can be used for environmental variables and, in my case, init configuration commands. As a part of the Librespeed package, a MySQL template is published, which I used to create a table within a database to prepare for data from speed tests to be stored.The challenge was then when the MySQL container first deployed, I needed this template to be applied so upon start the database was ready to go. This was accomplished via config maps and an init.sql definition. I’ll only post part of the config map here, as the full file is in the repository linked above:
---
apiVersion: v1
kind: ConfigMap
metadata:
  name: mysql-initdb-config
data:
  init.sql: |
    use kptspeedtest;
    SET SQL_MODE = "NO_AUTO_VALUE_ON_ZERO";
    SET AUTOCOMMIT = 0;
    START TRANSACTION;
    SET time_zone = "+00:00";
The only addition from Librespeed was to first select the database “kptspeedtest” The rest is just a copy and paste of their template.
Persistent Volume Claim
In a previous post, I went over my storage setup for persistent storage in Kubernetes. I needed this so when the mysql container is either restarted/moved/deleted etc, the data is still there. The PVC’s job is to request a Persistent Volume for a container from a Storage Class. In my example I already have the SC defined, so I create a PVC for a 20gig storage block:
apiVersion: v1
kind: PersistentVolumeClaim
metadata:
  name: speedtest-db-pvc
  annotations:
    volume.beta.kubernetes.io/storage-class: "freenas-nfs-csi"
spec:
  storageClassName: freenas-nfs-csi
  accessModes:
    - ReadWriteOnce
  resources:
    requests:
      storage: 20Gi
Pod Definition
Here is where all the components came together for the pod definition. I’ll step through this as it is a longer manifest:
apiVersion: v1
kind: Pod
metadata:
  name: speedtest-db
  labels:
    app: speedtest-db
Here, I made a pod named “speedtest-db” and applied a label of app: speedtest-db. Remember from the service definition I used the same name? This is how the service knows how to target this container.
spec:
  volumes:
  - name: data
    persistentVolumeClaim:
      claimName: speedtest-db-pvc
  - name: mysql-initdb
    configMap:
      name: mysql-initdb-config
Next under spec.volumes, I first associated the PVC. This references the PVC name above. Then I applied the configMap using the name of the config map here:
 containers:
  - name: speedtest-db
    image: docker.io/mysql:latest
    ports:
    - containerPort: 3306
    env:
    - name: MYSQL_DATABASE
      value: "kptspeedtest"
    - name: MYSQL_USER
      value: "speedtest"
    - name: MYSQL_PASSWORD
      value: "speedtest"
    - name: MYSQL_ROOT_PASSWORD
      value: "speedtest"
    volumeMounts:
      - mountPath: /var/lib/mysql
        name: data
      - name: mysql-initdb
        mountPath: /docker-entrypoint-initdb.d
Then, I gave the definition of the image/ports/environment variables and volumeMounts here. Note, the environment variables you would most likely use are Config Secrets/Config Maps for a more secure/traditional setup.
The volumeMounts are what I used to mount the PV under /var/lib/mysql using the data label, and then provide the initdb config map that was created earlier to prepare the database.
Speedtest Web Server Deployment
Again, the full manifest is linked here. This example is a Deployment, which is to control the lifecycle/scaling/down scaling of a pod. Technically it’s not needed, but I was throwing in some concepts I had previously learned.
Load Balancer Service
Just like I needed a consistent IP to reach the back end MySQL, I also need a way for consistent and externally accessible entrance into the pods.
apiVersion: v1
kind: Service
metadata:
  name: speedtest-lb
spec:
  type: LoadBalancer
  ports:
  - port: 80
    targetPort: 80
  selector:
    app: speedtest-app
  externalIPs:
  - 192.168.66.251
---
This creates a service of type LoadBalancer, on port 80, and using a defined external IP. This IP then is advertised by Kube Router via BGP to my network to allow routing to the pod. I manually specified this for now, but I hope to add logic in the future to tie into my ipam system and provide next available IP settings.
I will not go over the deployment part of the file, as those concepts I am still testing and learning about.
Onto the container I simply defined the image, a label, and expose it via port 80:
template:
    metadata:
      labels:
        app: speedtest-app
    spec:
      containers:
      - name: speedtest-app
        image: git.internal.keepingpacetech.com/kweevuss/speedtest:latest
        ports:
        - containerPort: 80
Deployment
Now it was time to finally give this a go!
Creating the speedtest-db container:
kubectl apply -f speedtest-db-storage-pod.yaml

persistentvolumeclaim/speedtest-db-pvc created
pod/speedtest-db created
configmap/mysql-initdb-config created
service/mysql created
Several components were created: a PVC, the pod itself, a config map, and the mysql service. I verified with some show commands:
kubectl get pvc
NAME STATUS VOLUME CAPACITY ACCESS MODES STORAGECLASS VOLUMEATTRIBUTESCLASS AGE

speedtest-db-pvc Bound pvc-54245a26-9fbe-4a8f-952e-fcdd6a25488b 20Gi RWO freenas-nfs-csi 63s
kubectl get pv | grep Bound
pvc-54245a26-9fbe-4a8f-952e-fcdd6a25488b 20Gi RWO Retain Bound default/speedtest-db-pvc freenas-nfs-csi <unset> 90skubectl get svc
NAME TYPE CLUSTER-IP EXTERNAL-IP PORT(S) AGE
mysql ClusterIP 192.168.100.145 <none> 3306/TCP 115sAbove, I saw what I expected to create. The important piece is that the MySQL service with my instance of a cluster IP of 192.168.100.145
To view the container progress, I ran kubectl get pods to see the container start. One thing I have learned is the init config can take some time to process, which you can see through the logs with kubectl describe or running kubectl logs.
kubectl describe pod speedtest-db

Events:
  Type     Reason                  Age                    From                     Message
  ----     ------                  ----                   ----                     -------
  Warning  FailedScheduling        2m32s (x2 over 2m42s)  default-scheduler        0/4 nodes are available: pod has unbound immediate PersistentVolumeClaims. preemption: 0/4 nodes are available: 4 Preemption is not helpful for scheduling.
  Normal   Scheduled               2m30s                  default-scheduler        Successfully assigned default/speedtest-db to prdkptkubeworker04
  Normal   SuccessfulAttachVolume  2m29s                  attachdetach-controller  AttachVolume.Attach succeeded for volume "pvc-54245a26-9fbe-4a8f-952e-fcdd6a25488b"
  Normal   Pulling                 2m17s                  kubelet                  Pulling image "docker.io/mysql:latest"
  Normal   Pulled                  2m16s                  kubelet                  Successfully pulled image "docker.io/mysql:latest" in 780ms (780ms including waiting). Image size: 601728779 bytes.
  Normal   Created                 2m15s                  kubelet                  Created container speedtest-db
  Normal   Started                 2m15s                  kubelet                  Started container speedtest-db
Through viewing the logs, you can see the different stages of the service. First it will start, but it will eventually stop and run the init commands we passed in via the configMap.
2024-11-04 00:14:47+00:00 [Note] [Entrypoint]: Creating database kptspeedtest
2024-11-04 00:14:47+00:00 [Note] [Entrypoint]: Creating user speedtest
2024-11-04 00:14:47+00:00 [Note] [Entrypoint]: Giving user speedtest access to schema kptspeedtest

2024-11-04 00:14:47+00:00 [Note] [Entrypoint]: /usr/local/bin/docker-entrypoint.sh: running /docker-entrypoint-initdb.d/init.sql
Finally:
2024-11-04 00:14:51+00:00 [Note] [Entrypoint]: MySQL init process done. Ready for start up.

2024-11-04T00:14:58.424295Z 0 [System] [MY-010931] [Server] /usr/sbin/mysqld: ready for connections. Version: '9.1.0'  socket: '/var/run/mysqld/mysqld.sock'  port: 3306  MySQL Community Server - GPL.
I needed to verify that the service is bound to this container:
kubectl describe svc mysql
Name:                     mysql
Namespace:                default
Labels:                   <none>
Annotations:              <none>
Selector:                 app=speedtest-db
Type:                     ClusterIP
IP Family Policy:         SingleStack
IP Families:              IPv4
IP:                       192.168.100.145
IPs:                      192.168.100.145
Port:                     <unset>  3306/TCP
TargetPort:               3306/TCP
Endpoints:                10.200.1.34:3306
Session Affinity:         None
Internal Traffic Policy:  Cluster
Events:                   <none>
Seeing the “Endpoints” filled in, with the IP of this container is a good sign and traffic entering the DNS name of “MySQL” was be sent to the back end endpoint.
I created the web server container:
kubectl apply -f speedtest-deploy.yaml
service/speedtest-lb created
deployment.apps/speedtest-deploy created
It was a little easier with two components, the load balancer and the pod, created.
Now I could go to the load balancers external IP and see it was working!
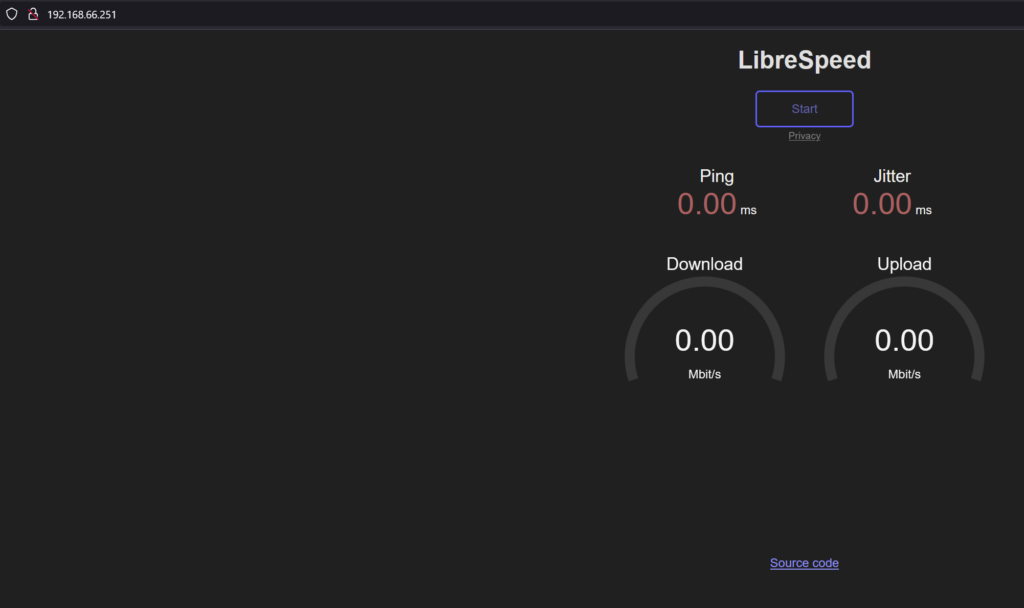
From my router, I saw the external IP was advertised via BGP. But, since my router does not support ECMP in overlay VPRN services, only one is active :(, otherwise it could load balance to any of the three worker nodes’ load balancer services.
*A:KPTPE01# show router 101 bgp routes 192.168.66.251/32
===============================================================================
 BGP Router ID:10.11.0.2        AS:64601       Local AS:64601
===============================================================================
 Legend -
 Status codes  : u - used, s - suppressed, h - history, d - decayed, * - valid
                 l - leaked, x - stale, > - best, b - backup, p - purge
 Origin codes  : i - IGP, e - EGP, ? - incomplete

===============================================================================
BGP IPv4 Routes
===============================================================================
Flag  Network                                            LocalPref   MED
      Nexthop (Router)                                   Path-Id     Label
      As-Path
-------------------------------------------------------------------------------
u*>i  192.168.66.251/32                                  None        None
      192.168.66.171                                     None        -
      65170
*i    192.168.66.251/32                                  None        None
      192.168.66.172                                     None        -
      65170
*i    192.168.66.251/32                                  None        None
      192.168.66.173                                     None        -
      65170
Exploring the database connection and data
Then, I attached to the Kubernetes pod web server to try to connect to the database, and watched as results were loaded. First, I attach to the pod directly:
kubectl exec -it "pod_name" -- /bin/bashMy pod was named speedtest-deploy-6bcbdfc5b7-5b8l5
From the docker image build, I installed mysql-client to try to connect to the database.
mysql -u speedtest -pspeedtest -h mysql


Type 'help;' or '\h' for help. Type '\c' to clear the current input statement.

mysql>
I was in! I simply connected via the login details that were passed in the environment variables of the speedtest database, and used the service name of “mysql” I was able to connect. Just like the web server’s config!
mysql> show databases;
+--------------------+
| Database           |
+--------------------+
| information_schema |
| kptspeedtest       |
| performance_schema |
+--------------------+
3 rows in set (0.04 sec)

mysql> use kptspeedtest;
Reading table information for completion of table and column names
You can turn off this feature to get a quicker startup with -A

Database changed
mysql> show tables;
+------------------------+
| Tables_in_kptspeedtest |
+------------------------+
| speedtest_users        |
+------------------------+

mysql> select * from speedtest_users;
Empty set (0.00 sec)
At this point, I saw the database named “kptspeedtest” with the table created from the MySQL template from Librespeed. Since I had not run any tests yet, there was no data.
After running a speed test, the results are displayed on screen. The idea from the application is you could copy the results URL and send to someone else to view in a browser themselves. When I did the same query I saw data in the database!
mysql> select * from speedtest_users;
+----+---------------------+----------------+------------------------------------------------------------------------+-------+----------------------------------------------------------------------------------+----------------+---------+---------+------+--------+------+
| id | timestamp           | ip             | ispinfo                                                                | extra | ua                                                                               | lang           | dl      | ul      | ping | jitter | log  |
+----+---------------------+----------------+------------------------------------------------------------------------+-------+----------------------------------------------------------------------------------+----------------+---------+---------+------+--------+------+
|  1 | 2024-11-04 00:26:38 | 192.168.66.171 | {"processedString":"10.200.1.1 - private IPv4 access","rawIspInfo":""} |       | Mozilla/5.0 (Windows NT 10.0; Win64; x64; rv:132.0) Gecko/20100101 Firefox/132.0 | en-US,en;q=0.5 | 1198.82 | 1976.27 | 2.00 | 0.88   |      |
+----+---------------------+----------------+------------------------------------------------------------------------+-------+----------------------------------------------------------------------------------+----------------+---------+---------+------+--------+------+
I know it will be hard to read, but you can see id=1, and the client information along with the upload/download/jitter/ping etc.
The first time seeing this work felt like a great accomplishment to get this far. Like I have said through this journey, I know there are enhancements to be made, like Config Secrets. My latest idea of using Init containers to check that the speedtest-db pod is started and the init commands have all run successfully before the web server pod is started.
I hope if you stumbled upon this, you found it useful and that it gave you hope to build your own cluster!